Creating a Custom View
You can create a custom view for scheduler. All the needed information is given in the current article.
General Approach
The following instructions explain how to add a custom view to your calendar created with Scheduler .NET.
There are two main steps to create a custom view:
- Implement client-side logic via JavaScript
- Define a server-side wrapper class which allows adding component to DHXScheduler class
1. Implement Client-side Logic via JavaScript
In order to add a new view to the client side scheduler, you need to define at least three mandatory methods that should do the following:
- view start date (e.g. start date of the week view)
- view end date (e.g. end date of the week view)
- date step (when user presses Next/Prev buttons for navigation in the view header)
Defining these methods will allow you to have a custom 'weekly' based mode, for example 'two week view', or 'decade view' (i.e. time scale is at the left side and day-columns are placed from left to right).
Methods specs:
- Date scheduler.date.{viewName}_start (Date active_date) - takes the specified scheduler date and returns the start date of the view interval (e.g. the first day of the specified week in the Week view, etc.)
Returns: Date
- Date scheduler.date.get_{viewName}_end (Date start_date) - takes the start date (returned by the above method) and returns the end date of
the view interval (e.g. the last day of the current week in the Week view, etc.).
If the method is not defined add_{viewName} will be used instead.
Returns: Date
- Date scheduler.date.add_{viewName}(Date date, Number inc) - specifies what date should be added(subtracted) to(from) the currently active date, when the user clicks on the 'Next', 'Prev' navigation buttons in the header.
Returns: Date
Where {viewName} is an arbitrary name of the custom view. For example: scheduler.date.twoWeek_start, scheduler.get_twoWeek_end, scheduler.date.add_twoWeek.
For more details follow these instructions.
Adding methods for totally custom display
In order to get a fully custom display, as it's made for Grid, Agenda and Timeline views, you need to define the following functions in addition to the mandatory ones:
- scheduler.templates.{viewName}_date
scheduler.templates.{viewName}_date = function(start_date, end_date){
    ...
}
- X-Axis
scheduler.templates.{viewName}_date = function(start_date, end_date){
    ...
}
It is recommended to write the code for a custom view in the handler of the OnTemplateReady event for correct rendering on a page. That event fires when the scheduler templates are ready.
You can find more information on this issue here.
2. Define a Server-side Wrapper Class
You can add your own views in Scheduler .NET by creating a new class view derived from the base class SchedulerView.
The SchedulerView class has the following members:
- Label - view tab text
- Name - view name
- TabClass - CSS class for the view tab
- TabPosition - tab left margin
- TabStyle - CSS style to be applied to the tab
- TabWidth - width of the view's label
- ViewType - type of the view, must match the {viewname} you used on the client side
3. Samples
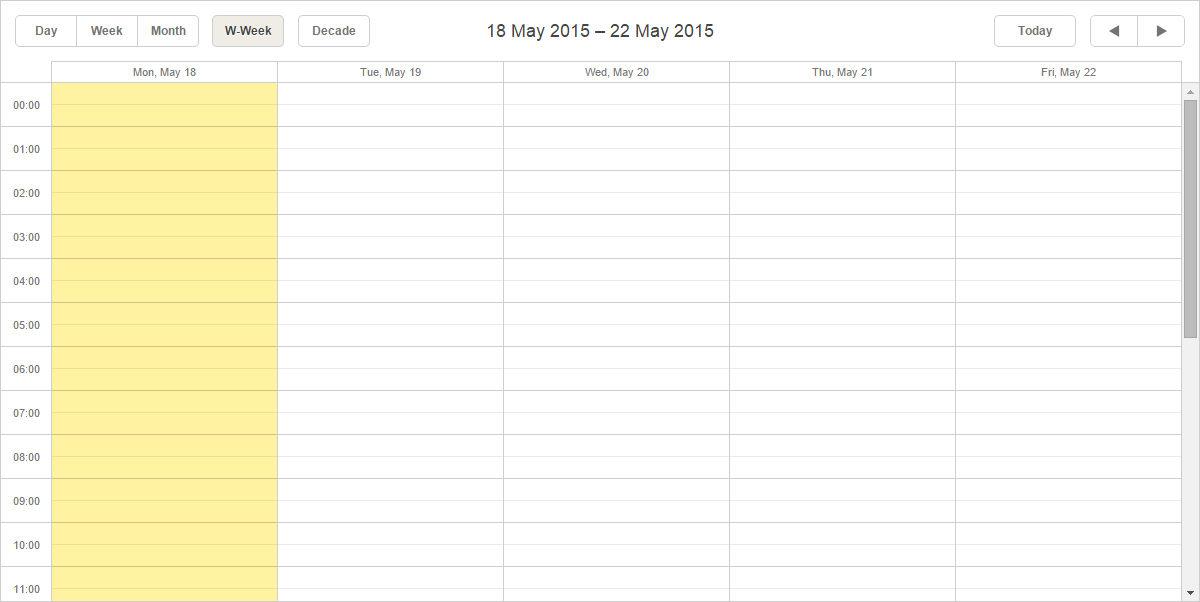
Work week view
Client side
<script type="text/javascript">
scheduler.attachEvent("onTemplatesReady", function () {
    //work week
    scheduler.date.workweek_start = scheduler.date.week_start;
    scheduler.templates.workweek_date = scheduler.templates.week_date;
    scheduler.templates.workweek_scale_date = scheduler.templates.week_scale_date;
    scheduler.date.add_workweek = function (date, inc) { return scheduler.date.add(date, inc * 7, "day"); }
    scheduler.date.get_workweek_end = function (date) { return scheduler.date.add(date, 5, "day"); }
});
</script>
Server side
Let's create a work week view class. The logic of this view was defined earlier via JavaScript. Now we add this view to the Scheduler.NET:
public class WorkWeekView : SchedulerView
{
  public WorkWeekView(): base()
  {
    // view type must be equal to the one defined on the client
    Name = ViewType = "workweek";
  }
}
Then add your view to the scheduler:
var calendar = new DHXScheduler();
 ...
calendar.Views.Add(new WorkWeekView()
{
Label = "W-Week"
});
...

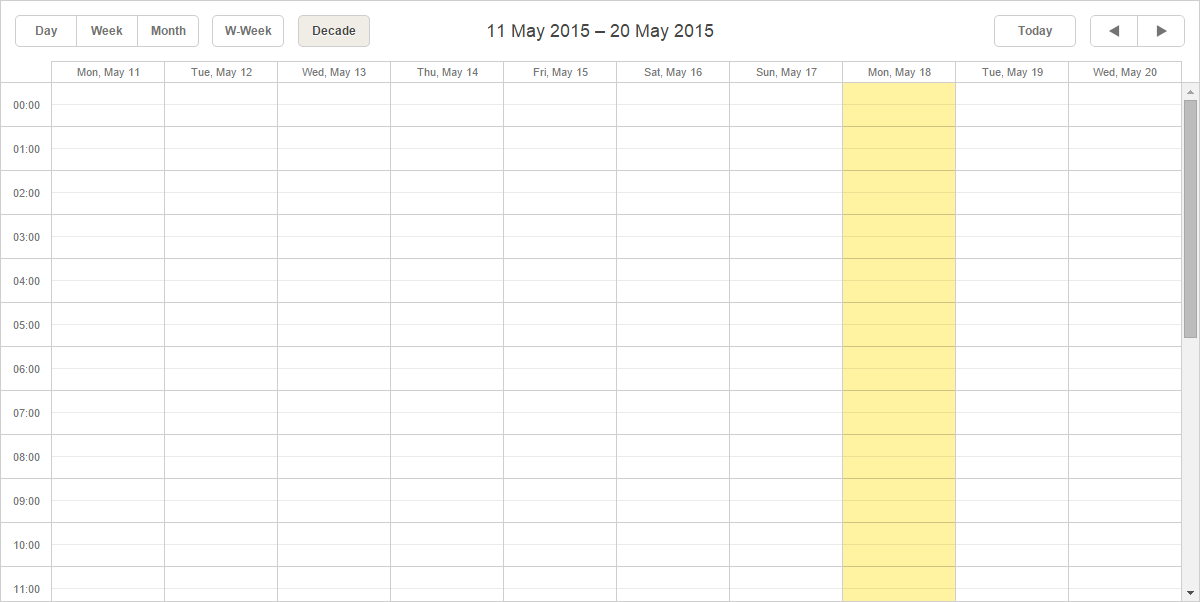
Decade view
Client side
<script type="text/javascript">
function beforeInit() {
    scheduler.attachEvent("onTemplatesReady", function () {
        //work week
        scheduler.date.workweek_start = scheduler.date.week_start;
        scheduler.templates.workweek_date = scheduler.templates.week_date;
        scheduler.templates.workweek_scale_date = scheduler.templates.week_scale_date;
        scheduler.date.add_workweek = function (date, inc) { return scheduler.date.add(date, inc * 7, "day"); }
        scheduler.date.get_workweek_end = function (date) { return scheduler.date.add(date, 5, "day"); }

        //decade
        scheduler.date.decade_start = function (date) {
            var ndate = new Date(date.valueOf());
            ndate.setDate(Math.floor(date.getDate() / 10) * 10 + 1);
            return this.date_part(ndate);
        }

        scheduler.templates.decade_date = scheduler.templates.week_date;
        scheduler.templates.decade_scale_date = scheduler.templates.week_scale_date;
        scheduler.date.add_decade = function (date, inc) { return scheduler.date.add(date, inc * 10, "day"); }
    });
}
</script>
Server side
Create a decade view class. The logic of the decade view will be added later:
public class DecadeView : SchedulerView
{
    public DecadeView()
        : base()
    {
        // view type must be equal to the one defined on the client
        Name = ViewType = "decade";
    }
}
Now we simply add this view to the Scheduler .NET:
var scheduler = new DHXScheduler();
...
scheduler.Views.Add(new DecadeView()
{
    Label = "Decade"
});
...

4. Advanced Client-side Logic. Custom Markup and Display of Scheduler Views
Creating a fully custom view requires working with the internal API and private methods of the scheduler, which is usually not recommended and doesn't guarantee backward compatibility.
Displaying a custom view
scheduler.{viewname}_view(boolean activated)
will be called each time the view is activated or deactivated. You can render the view's markup and inject it into the calendar container there. When the view is deactivated you can clear any temporary values.
A sample for scheduler.agenda_view:
scheduler.agenda_view=function(mode){
    scheduler._min_date = scheduler.config.agenda_start||scheduler.date.agenda_start(scheduler._date);
    scheduler._max_date = scheduler.config.agenda_end||scheduler.date.add_agenda(scheduler._min_date, 1);
    scheduler._table_view = true;
    set_full_view(mode);
    if (mode){
        // agenda tab activated
    } else {
        // agenda tab de-activated
    }
};
You can find the full code on GitHub.
Rendering events in a custom view
You'll also need to create a wrapper around the scheduler.render_data method for rendering events in a custom view. The method should generate HTML or DOM elements for the events and append them to the data layout.
scheduler.render_data(Array events)
- A sample for Agenda view:
scheduler.render_data=function(evs){
    if (this._mode == "agenda")
        //fill agenda tab
    else
        return old.apply(this,arguments);
};
You can find the full code on GitHub.
- A sample for Year view:
scheduler.render_data = function(evs) {
    if (!is_year_mode()) return old.apply(this, arguments);
    for (var i = 0; i < evs.length; i++)
        this._year_render_event(evs[i]);
};
You can find the full code on GitHub.
When you'll be rendering events in a custom view, make sure that the event elements have the "event_id" attribute set. It will allow scheduler to trace clicks and double clicks on events. You can see an example on GitHub.
That's it for a basic agenda or grid-like view. Although, drag-and-drop support would require some additional coding.