- Downloading and Installing Scheduler .NET
- How to apply the license key?
- Simple ASP.NET WebForms Application with Scheduler
- Step 1. Create a new Microsoft Visual Studio Project
- Step 2. Add the References
- Step 3. Set up a Database
- Step 4. Create a Data Model
- Step 5. Define the Startup Page
- Step 6. Load Events to Scheduler
- Step 7. Define the CRUD Logic
- Step 8. Render Scheduler on the Page
- Simple ASP.NET MVC Application with Scheduler
- Scheduler .NET with Entity Framework Database First
- Scheduler .NET with Entity Framework Code First
Simple ASP.NET WebForms Application with Scheduler
In this tutorial we'll show how to add scheduler into ASP.NET WebForms C# application.
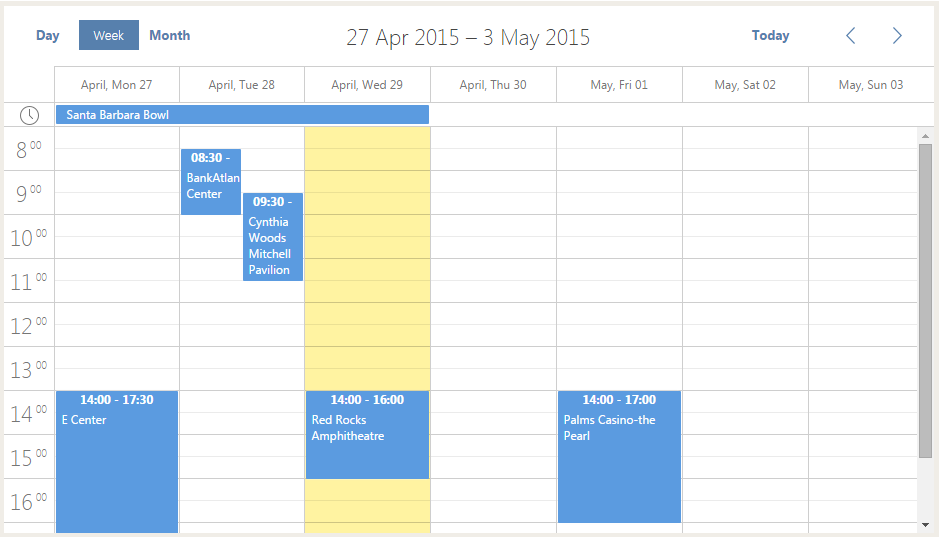
You may follow these simple instructions to create the application or download demos here: Download Scheduler .NET package.
Step 1. Create a new Microsoft Visual Studio Project
- open Visual Studio
- go to File -> New -> Project and select ASP.NET Web Application in the desired programming language
- name a new application 'SchedulerNetAsp'
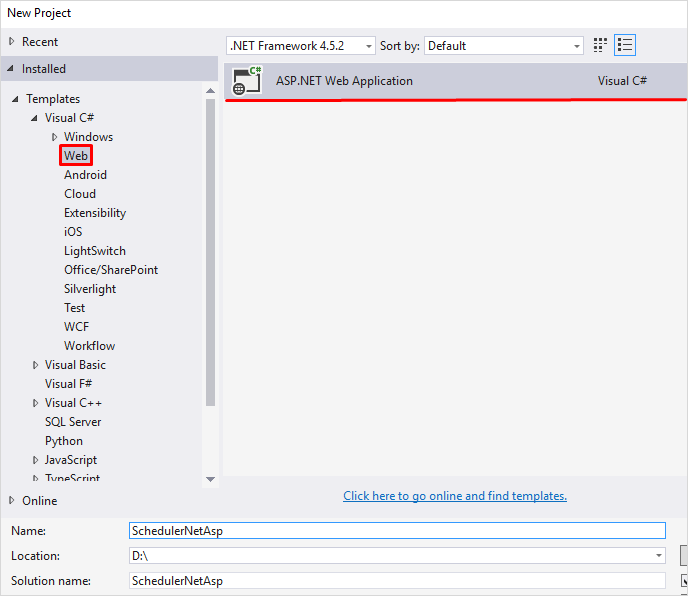
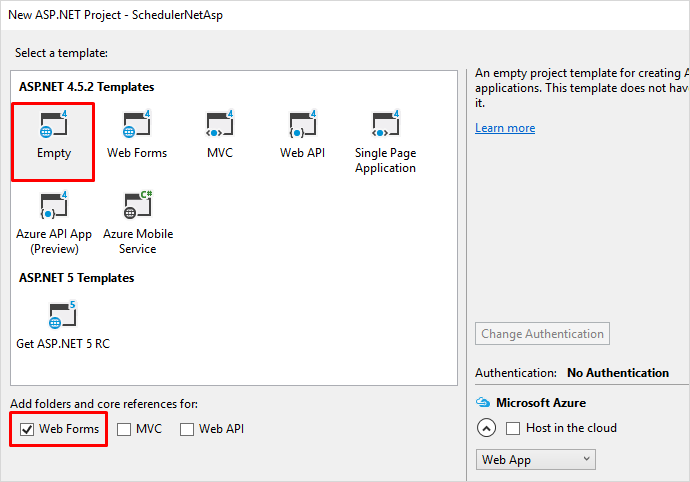
Select an Empty template and tick the Web Forms box. After that click OK.
Step 2. Add the References
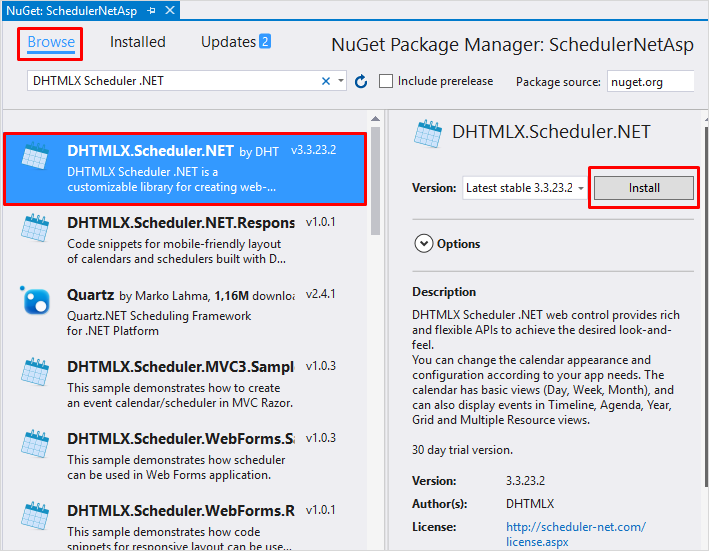
Once you have created a new .NET project, you should add the reference to the required library - Scheduler .Net.
You can make use of the NuGet package for this purpose:
1 . Right click on your project in the Solution Explorer and select Manage NuGet Packages. It will open the Manage NuGet Packages dialog box.
2 . Now select the Online option in the left bar and search for DHTMLX.Scheduler.NET package
Step 3. Set up a Database
After that you need to create a database (or use any valid one) to store the calendar events. In this database create the Events table with the following fields (all fields are mandatory):
- id - (int; primary key, identity) the ID of the event
- text - (nvarchar(256)) the description of the event
- start_date - (datetime) the date and the time the event starts
- end_date - (datetime) the date and the time the event ends
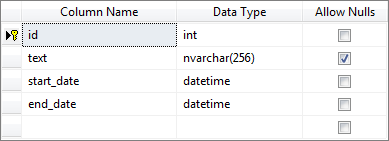
The table can also be created with the following query:
CREATE TABLE [Events](
  [id] int IDENTITY(1,1) NOT NULL,
  [text] nvarchar(256) NULL,
  [start_date] datetime NOT NULL,
  [end_date] datetime NOT NULL,
  PRIMARY KEY (id)
)
While the DB tool is open, you can add some data to the table.
Step 4. Create a Data Model
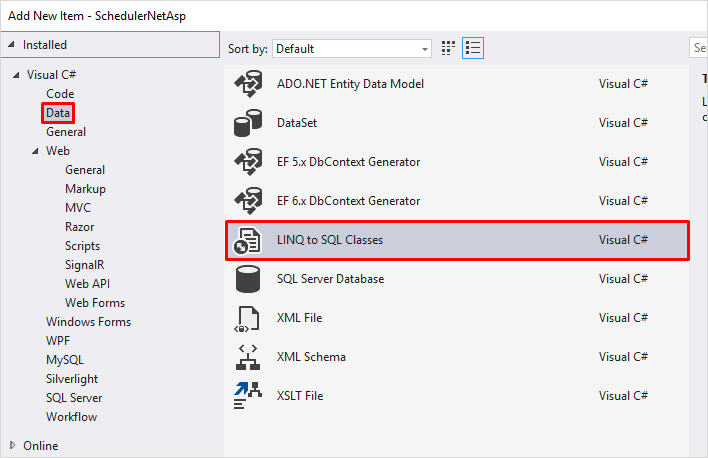
To map to the database you have just created, you should add a LINQ to SQL class to the project:
- follow SchedulerNetAsp -> Add -> Add new item
- select 'Data','Linq to SQL Classes'
- name the new class - 'Scheduler'.
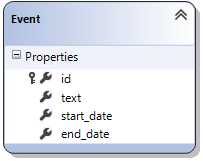
To complete the process, drag-and-drop the 'Events' table to the Model Designer.
Step 5. Define the Startup Page
The startup page contains main code and event handlers of the app. In our case, it's general Scheduler configuration and load/update event handlers.
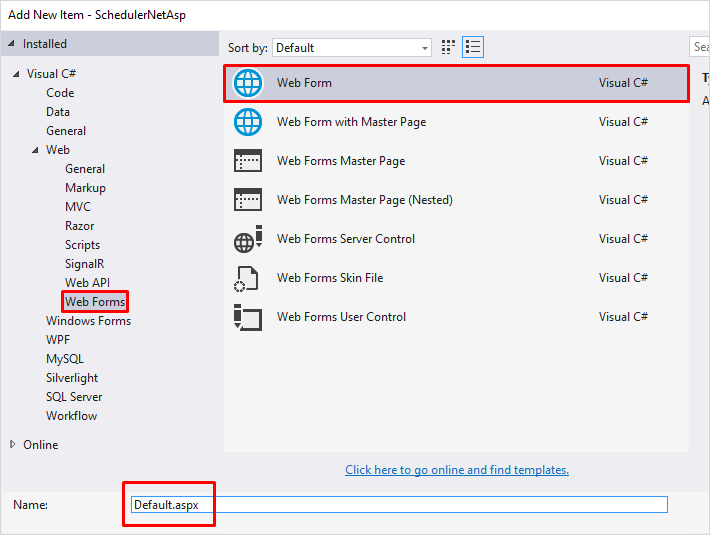
To define the startup page, you should add a Web Form .aspx file to the project. For this, you need to:
- follow SchedulerNetAsp -> Add -> Add new item
- select Web -> Web Forms
- name a new file Default.
Open the code-behind file of the startup page (Default.aspx.cs) and change its content to the following:
using System;
using DHTMLX.Scheduler;

namespace SchedulerNetAsp
{
    public partial class Default : System.Web.UI.Page
    {
        public DHXScheduler Scheduler { get; set; }
        protected void Page_Load(object sender, EventArgs e)
        {
            this.Scheduler = new DHXScheduler();

            Scheduler.InitialDate = new DateTime(2016, 11, 24);// the initial data of Scheduler

            Scheduler.Config.first_hour = 8;//the minimum value of the hour scale
            Scheduler.Config.last_hour = 19;//the maximum value of the hour scale
            Scheduler.Config.time_step = 30;//the scale interval for the time selector in the lightbox
            Scheduler.Config.limit_time_select = true;//sets max and min values for the time selector in the lightbox to the values of the last_hour and first_hour options

            Scheduler.DataAction = this.ResolveUrl("~/Data.ashx");// the handler which defines loading data to Scheduler
            Scheduler.SaveAction = this.ResolveUrl("~/Save.ashx");// the handler which defines create/update/delete logic
            Scheduler.LoadData = true;
            Scheduler.EnableDataprocessor = true;
        }
    }
}
Step 6. Load Events to Scheduler
To populate Scheduler with the data from the 'Events' table, create a new generic handler and name it 'Data.ashx'. Copy the following code there:
using System.Web;
using DHTMLX.Scheduler.Data;
using SchedulerNetAsp.Models;

namespace SchedulerNetAsp
{
    public class Data : IHttpHandler
    {
        public void ProcessRequest(HttpContext context)
        {
            context.Response.ContentType = "text/json";// the data comes in JSON format
            context.Response.Write(
                new SchedulerAjaxData(new SchedulerDataContext().Events) //events for loading to scheduler
            );
        }

        public bool IsReusable { get { return false; } }
    }
}
Step 7. Define the CRUD Logic
At the next step, you should define Create/Update/Delete logic.
Create a new generic handler and name it 'Save.ashx'. Copy the following code there:
using System;
using System.Collections.Generic;
using System.Web;
using DHTMLX.Common;
using SchedulerNetAsp.Models;

namespace SchedulerNetAsp
{
    public class Save : IHttpHandler
    {

        public void ProcessRequest(HttpContext context)
        {
            context.Response.ContentType = "text/xml";// the data is passed in XML format

            var action = new DataAction(context.Request.Form);
            var data = new SchedulerDataContext();

            try
            {
                var changedEvent = (Event)DHXEventsHelper.Bind(typeof(Event), context.Request.Form);//see details below

                switch (action.Type)
                {
                    case DataActionTypes.Insert: // your Insert logic
                        data.Events.InsertOnSubmit(changedEvent);
                        break;
                    case DataActionTypes.Delete: // your Delete logic
                        changedEvent = data.Events.SingleOrDefault(ev => ev.id == action.SourceId);
                        data.Events.DeleteOnSubmit(changedEvent);
                        break;
                    default:// "update" // your Update logic
                        var updated = data.Events.SingleOrDefault(ev => ev.id == action.SourceId);
                        DHXEventsHelper.Update(updated, changedEvent, new List<string>() { "id" });// see details below
                        break;
                }
                data.SubmitChanges();
                action.TargetId = changedEvent.id;
            }
            catch (Exception a)
            {
                action.Type = DataActionTypes.Error;
            }

            context.Response.Write(new AjaxSaveResponse(action));
        }

        public bool IsReusable { get { return false; } }
    }

}
The details on DHXEventsHelper.Bind() and DHXEventsHelper.Update() methods are given in the article Managing CRUD operations, chapter Helpers.
Step 8. Render Scheduler on the Page
The last thing you need to do is to render Scheduler on the page. Additionally, you must redefine some styles specified in the master page by default, in order to render Scheduler correctly.
Open the Default.aspx file and replace the default style with the code below:
<%@ Page Language="C#" AutoEventWireup="true" CodeBehind="Default.aspx.cs" Inherits="SchedulerNetAsp.Default" %>

<style>
    #scheduler_here table {
        border: none;
        border-collapse: collapse;
    }

    #scheduler_here table td {
        padding: 0;
        border: none;
    }

    #scheduler_here table th {
        padding: none;
    }
</style>
<div style="height: 509px; width: 100%;">
    <%= this.Scheduler.Render()%>
</div>
Beware, when a scheduler is rendered, it adjusts its height to the height of the parent element. That's why, when you use 'this.Scheduler.Render()', make sure that the parent container isn't collapsed and has the initial height set. Otherwise, the scheduler won't be displayed.
That's all. A basic ASP.NET WebForms C# application with Scheduler is ready.